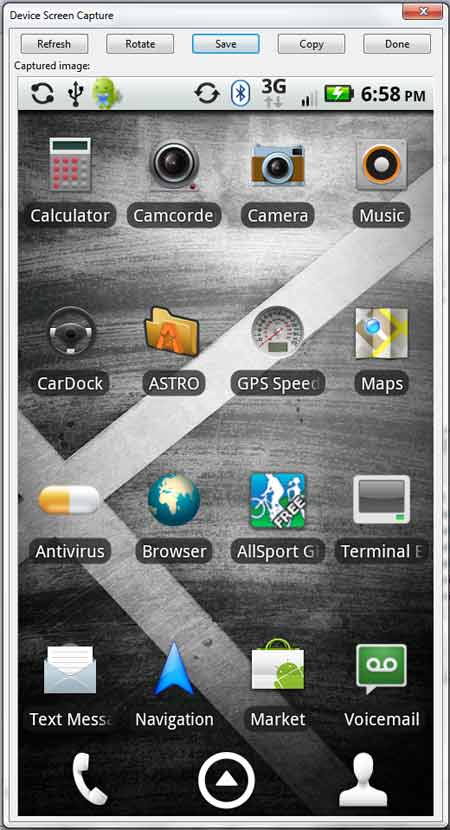
In the following segment, I cover How to take Screenshots with a Motorola Droid X from Windows. I find taking Droid snapshots essential for creating visual tutorials on how to navigate and use an Android based phone. Droid Screenshot Tutorials provide that extra layer of familiarity, and help assist the user in getting the task at hand accomplished.
Android Screenshot Taking From Windows Prerequisites:
- Windows XP, Vista, 7 PC
- Android Smartphone and USB cable (Droid X was used here)
- USB Debugging enabled on your Droid
- Android SDK (Software Development Kit)
- JDK (Java Development Kit)
Taking Screenshots with a Droid from Windows
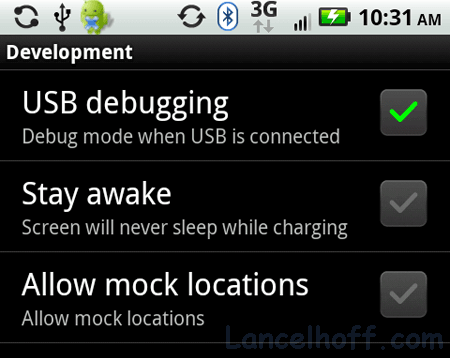
- From your Droid X, navigate to Settings > Applications > Development, and check the USB debugging option.
- Download JDK (Java SE Development Kit) and install it to the default location on your PC.
- Download Android SDK Windows executable, and install it to the default location on your PC.
- Start The SDK Manager Start > Programs > Android SDK Tools > SDK Manager
- In addition to the list of suggested packages that appear, Scroll down and check Google USB Driver Package, and then click Install - the download and installation process WILL take quite some time!
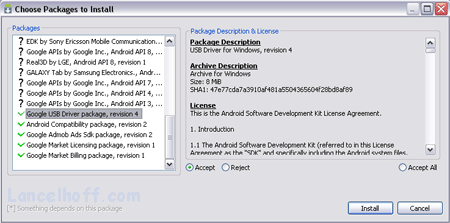 *Optional: Now is a good time to install other packages you might need for application development, if you plan to do so in the future!
 - Connect your Droid X to your PC via USB cable.
- Download and install the 32 bit or 62 bit Motorola USB drivers.
- Click ddms.bat from C:\Program Files\Android\android-sdk\tools
- From the Debug Monitor, Navigate to Device > Screen Capture
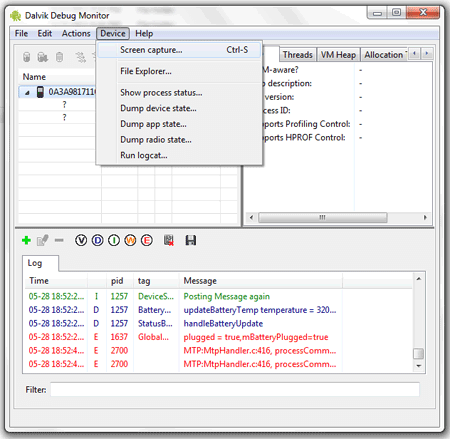
- You should now be presented with a Window that enables you to capture the active screen of your attached Droid X.
