How to Disable Chrome Cache for good on the Google Chrome web browser. By default, the Chrome browser caches site content including images, scripts, downloads, cookies and other website data, as you browse the internet. It does this so it doesn't need to fetch this content again the next time you open the same webpages.
Why Caching Browsing History isn't always good
Caching browsing data can help speed up your browsing experience by saving bandwidth, however caching isn't always good. For example; when a page is cached, users might be missing out on page updates or changes, forcing them to perform a refresh to see the newest page content. There may also be security and privacy concerns prompting a person to want to prevent Chrome from caching pages visited on the internet.
Fortunately there are some simple ways to stop Chrome from caching pages. In the following simple solution, I'll cover the process to remove browsing history and completely clear chrome cache. In addition, I'll provide both a manual and automated method of disabling Chrome caching.
How to Completely Remove Chrome Browsing History
To Clear Chrome Cache and remove all Chrome browsing history, use these steps:
- From Google Chrome, click the three dots in the upper right hand corner of the window.
- Select "Settings" from the dropdown menu.
- Under the "Privacy and security" section, click "Clear browsing data."
- In the popup window that appears,
(1.) choose "Advanced"
(2.) select "All time" from the dropdown menu.
(3.) Check all boxes related to what you want to clear.
(4.) Press "Clear data" to delete your cache and clear all of your browsing data.
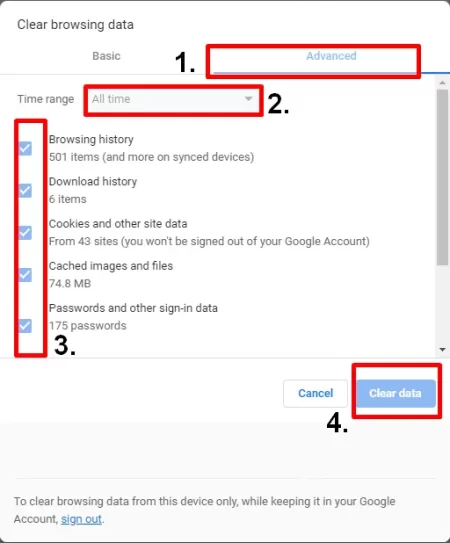
After you have cleared your cache, Chrome will no longer have any stored temporary files, including images, scripts, and other website data. Note that this may result in slower page loading times as Chrome will have to download all of the data again from websites as you visit them.
How to Disable Chrome Cache manually
To disable the cache in Google Chrome manually:
- From Google Chrome, press F12 to open Developer Tools.
- From Developer Tools,
(1.) Select "Network".
(2.) Check the box to "Disable cache".
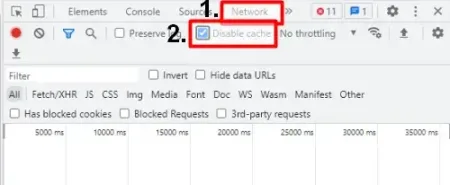
- Click X to close the Developer Tools window.
After completing these steps, the cache in Google Chrome will be disabled whilst Developer Tools are open. Any changes to a website will become immediately visible without having to clear the cache. Please note that having cache disabled will affect the speed and performance of Chrome.
How to Disable Chrome Cache with Cache Killer
You can also use an extension to Disable Chrome Cache. Perhaps the easiest automated method I have found is to use the Cache Killer extension created by MaxiBlue. This extension works by automatically clearing browser Cache before each page load. As a result, Cache Killer prevents Cache from ever locally being stored at your computer.
- Add the Cache Killer extension from the Chrome Web Store to your Browser.
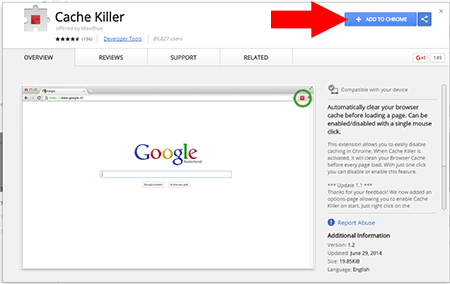
- Then, to turn on Cache Killer - Click the Icon in the upper right hand corner of your browser.
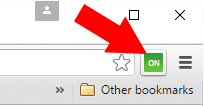
- Finally, go browse and surf the Internet and enjoy cache free browsing.
That's all it takes to Disable Chrome Cache for good.
