Are you wondering how to slipstream service pack 3 into a Windows XP installation CD. As you probably already know, Microsoft released the service pack 3 final release for Windows XP to the public. Service pack 3 (SP3) includes all of the previous updates, hotfixes and security updates to date, rolled into one simple package.
By Slipstreaming service pack 3 into your Windows installation disk, you will have all hotfixes and updates already efficiently integrated. This means that you will have virtually no updates left to do via Windows Update after performing a fresh install of Windows XP.
Note: Your original Windows XP CD must have at least service pack 1 already integrated for this tutorial to work. For most people this isn't an issue as the last Windows XP CD's sold already included SP1 and SP2.
Slipstream Service Pack 3 into Windows XP
To slipstream service pack 3:
- Insert your Windows XP installation disk
- Download the Official Service Pack 3 from Microsoft
- Download and install nLite
- Navigate to Start -> Programs -> nLite and click nLite to launch the program.
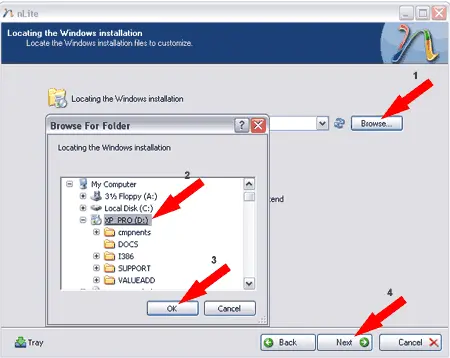
- Click Next. Once you arrive at the Locating the Windows installation page, click Browse and select the drive where your Windows XP installation disk is located:
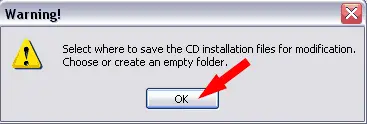
- Next, nLite will ask you where to save the CD installation files for modification, click OK
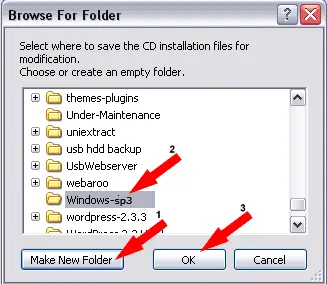
- Now you need to create a folder to save to and work from. Click the Make New Folder button, type in a folder name, and click OK
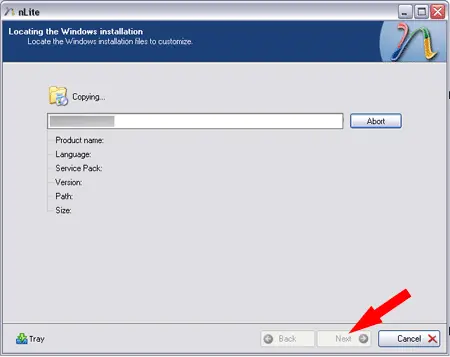
- Next, nLite will attempt to copy all files from the Windows installation disk to the folder you have created. Once it has finished, click Next
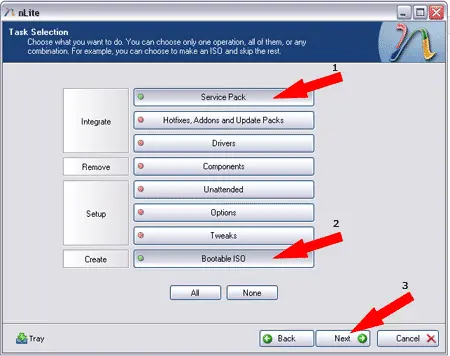
- Click Next until you arrive at the Task Selection page, select the Service Pack and Bootable ISO options and then click Next
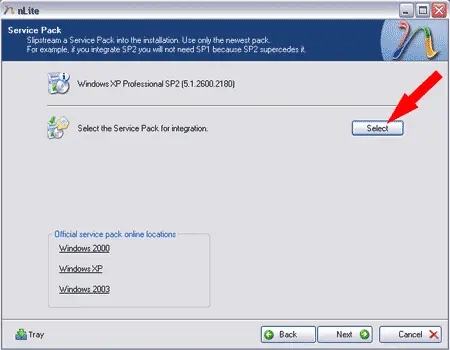
- Next click Select and browse to and select the Service Pack 3 executable that was downloaded in step 2
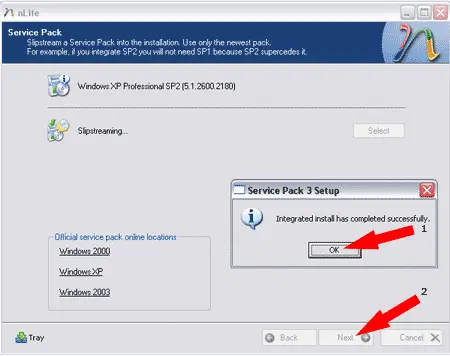
- Next, nLite will proceed to integrate Service Pack 3 into your Windows installation. Once it has finished, click OK, then click Next
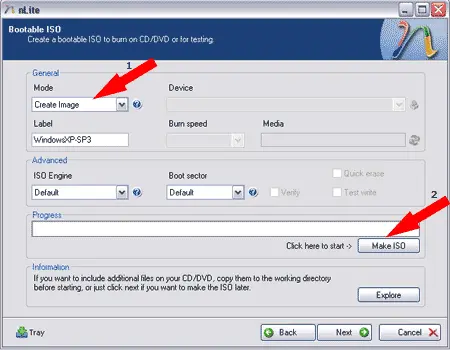
- Next, we need to create the new image that will be burned to a CD. Under Mode, select the option to Create Image and then click Make ISO
- Now all that's left to do is use your favorite CD burning utility to burn the ISO to a disk.
Enjoy your new Windows install disk with Service Pack 3 integrated!